Download and Install the SysInfo Advanced PST Recovery Tool on your system as an administrator.
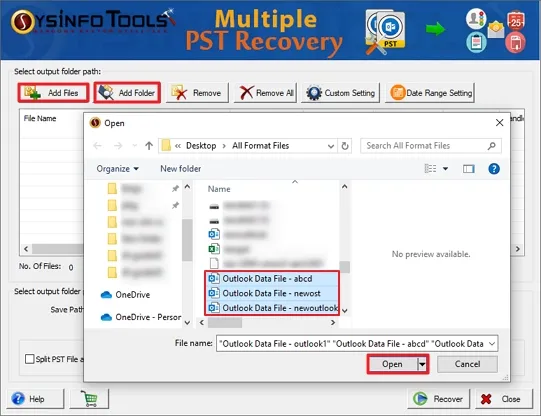
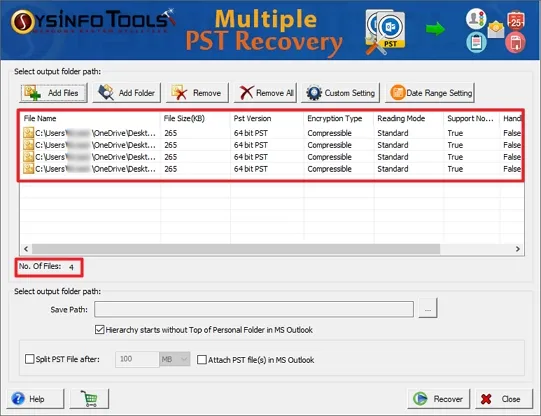
Now, click on “Add Files” or “Add Folder” from the taskbar and select the PST files/folder from your system.
Once added, you can also remove any file if not require longer or is added mistakenly. Also, you can opt to re-add more PST files.
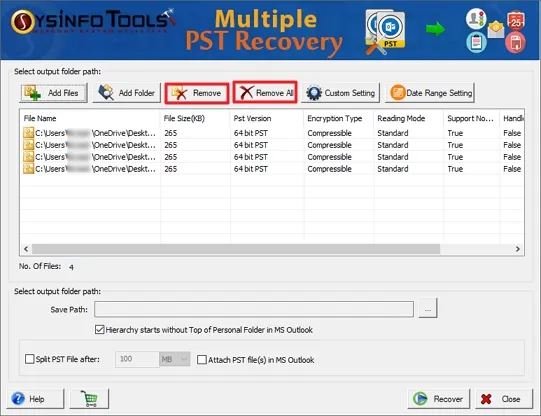
Further, check the added PST files in the preview panel. You can also see the total no. of files added.
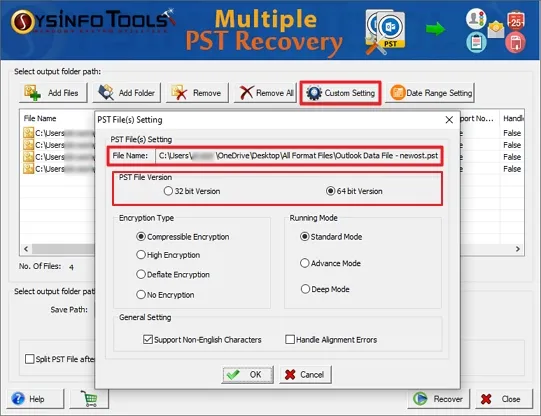
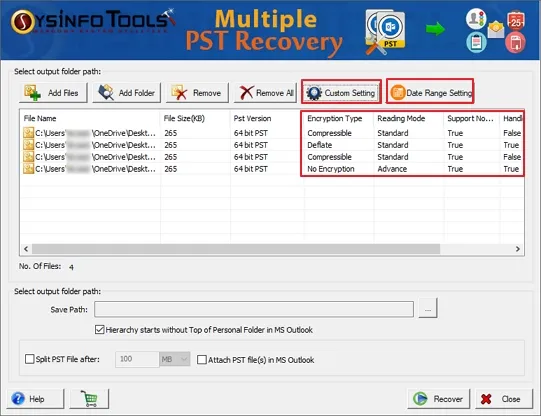
Once the file is selected, choose any file and click Custom Settings. A dialog opens. Here, check the file name and set the PST file version.
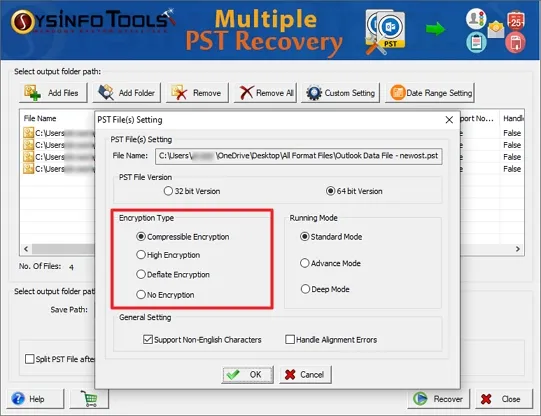
Further, pick any of the compression types: Compressible, High, Deflate, or No Encryption as required for your file.
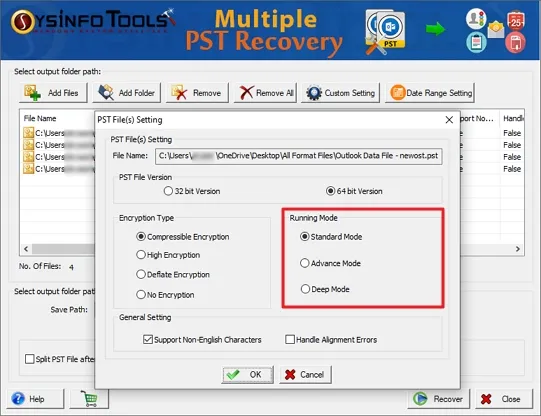
Choose either Standard, Advanced, or Deep Recovery Mode as per the severity of damage in your Outlook file.
You can choose the option to Handle Alignment Errors and Support Non-English Characters as per your need. Click OK.

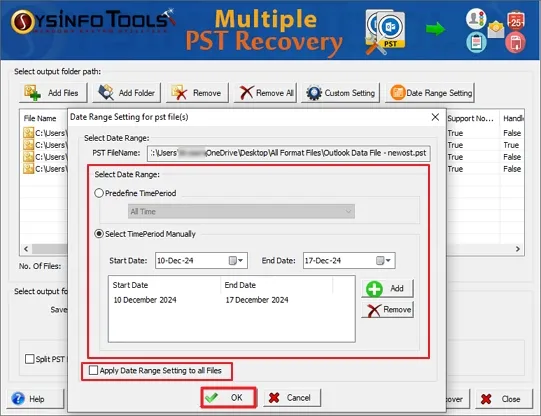
Click either Predefine TimePeriod or Select TimePeriod Manually to provide a specific range for the recovery of Outlook PST files. You can also choose to Apply Date Range Settings on All Files. Then, press OK.
Later, if you need to change any of the settings for your file related to recovery, compression, or others. Click the Custom Setting or Date Range Setting button and redo it. Additionally, check the made changes in the panel.
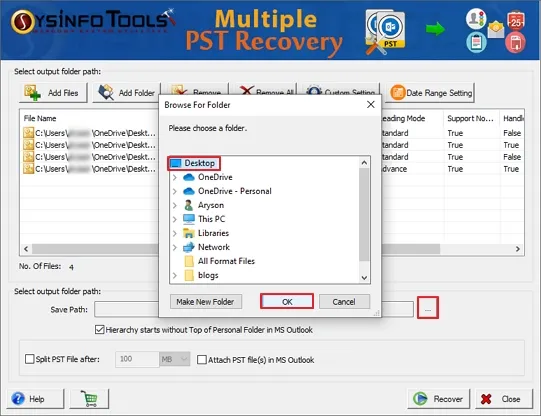
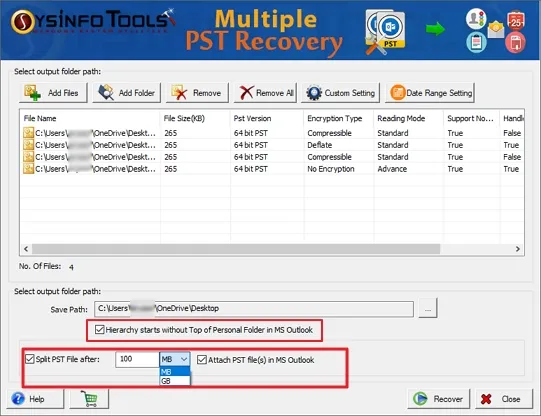
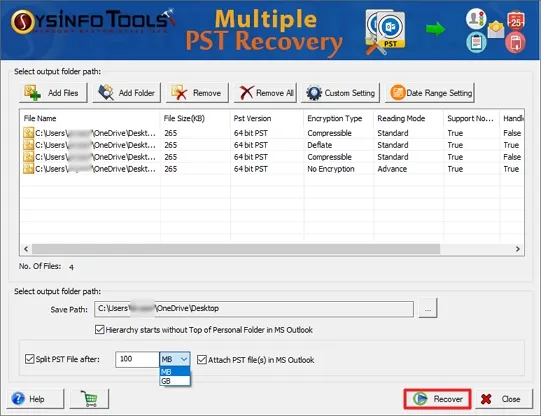
Click on “Save Path (...)” and you can define the location where you want to save the recovered PST file. Click OK.
Afterward, you can select other filter options for your resultant file. These include:
Lastly, hit the Recover button to start the process of recovering added Outlook files.
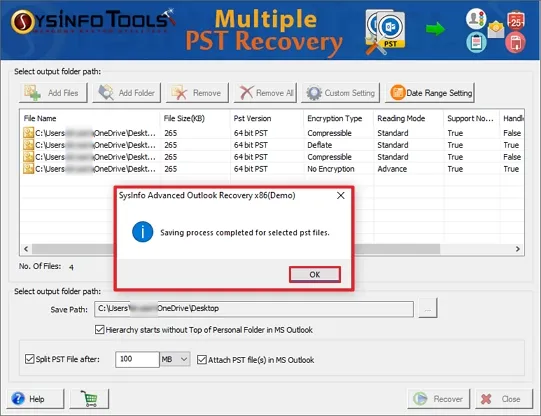
After the completion of the recovery process, a new window will pop up as “Saving process completed for selected pst files”. Then click “Ok” to finish the process.
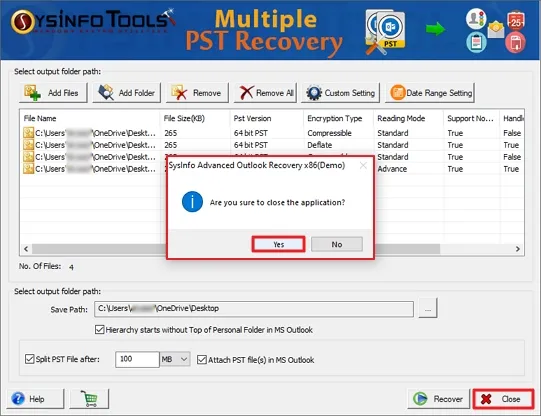
At last, click the Close button and when prompted to exit the application, click Yes to exit.